Ever stood in your kitchen or bathroom, frustrated by a droning or silent extractor fan and thought—can I actually fix this myself? The thought of ripping open an appliance to swap out its heart (the motor!) might sound wild, especially if you have zero electrical know-how. Yet, here’s the surprising truth: extractor fan motor replacement isn’t as intimidating as it seems for many common fan models. Loads of folks pull it off every year, saving themselves a small fortune in callout fees or a brand-new unit. But, there’s a right and safe way to do it. Knowing how your extractor fan works, picking the right parts, and approaching the job methodically can mean the difference between a smooth repair—and a smoking disaster. Ready to see if you should give the fan a second life or send it off to the recycling gods?
Understanding Your Extractor Fan and Why the Motor Fails
Think about how often you run that extractor fan. Hot showers, family dinner fry-ups, all of it sends clouds of moisture, grease, and tiny debris swirling through your home. Those motors work overtime sucking out the bad stuff. But over months and years, all those kitchen steams and bath times build up gunk on the internal blades and, more importantly, inside the motor itself.
The typical extractor fan pumps out airflow in the range of 80-120 cubic meters per hour for standard models. So, when it breaks, humidity and all those kitchen smells hang in the air far too long. Motors usually fail due to heat, dust, or plain old wear and tear. Sometimes, a fan will start making a grinding noise—that's usually a sign bearings are shot, or the coil windings are failing. If your fan just hums and doesn't spin, a burned-out motor is a major suspect. My daughter Piper once asked why her bathroom smelled like gym socks. She’s ten and not wrong. Without a functioning fan, that damp funk sets in quick.
Here’s the interesting bit: most extractor fans in homes fall into two repairable camps—the basic axial fan (like the cheap ones you find in most UK bathrooms), and the more robust centrifugal fan, which deals with tougher airflow jobs (think busy family kitchens). While the motor design differs, swap jobs are similar. In a 2022 survey by UK Home Fix, 41% of extractor fan failures could be traced straight to motor burnout, not broken blades or wiring issues.
Manufacturers almost never design these things as "throwaway." Most reputable brands like Vent-Axia, Xpelair, or Manrose make replacement motors and parts. The actual value of a bathroom fan motor on popular parts sites ranges from £14 to £45, so if you manage the repair, you can spend less than a fancy takeaway meal.
What about the warranty? If your fan’s under warranty, stop reading and call the manufacturer. Tinkering yourself can void it. Past that, just remember: safety first. Turn off the circuit breaker—no one wants a shocking surprise (I learned that the hard way changing a lamp once, believe me).
When to Replace vs. Repair—Signs You Really Need a New Motor
Extractor fans rarely just stop working for fun. There’s nearly always a clue. Sound, for one. If the fan makes rattling, squealing, or metallic scraping sounds, those poor bearings are crying for help. Sometimes, if you smell burning—like an overheated laptop—that’s electrical windings inside being fried. That’s a “do not pass go, do not collect £200, shut it off now” moment.
Then there’s the dead spin. Flick the switch, and nothing happens. Try spinning the blades with your fingers (safely, with power off). If the blades move freely, but the fan never switches on, you’ve probably got a dead motor. If the blades are stiff or seize up, seized bearings or a warped shaft could be to blame. Sometimes, built-up lint and nastiness can choke a motor—cleaning helps, but only if the windings aren’t fried already.
- Consistent humming, but no movement: Motor’s trying, but the internal coil is likely burned or the start capacitor has failed (in larger units).
- Intermittent operation: Worn brushes or dying windings. Sometimes a loose wire, but often prelude to total failure.
- Overheating case: Feel the fan housing after it’s been off for a while. Still hot? That’s not normal—motor’s running inefficiently.
Now, some things aren’t the motor. Faulty wiring, dead fuses, bad switches—these can all look like a dead fan. Rule those out first. A simple multimeter check usually does the trick. I keep one in the junk drawer, and even Piper knows how to use it. If you’re unsure, there are heaps of short video tutorials online that can show you how to safely test a fan’s wires and terminals with a meter.
Still convinced it’s the motor? Most people manage the swap-out with basic hand tools—screwdrivers, maybe pliers, sometimes a wire stripper. No exotic kit needed. The fiddliest bit is usually getting the front cover off. Some extractor fans hide screws behind little plugs or stickers, so don’t go yanking before you’re sure.
For those curious about the odds, here’s a breakdown:
| Cause of Fan Failure | Percent |
|---|---|
| Motor burnout (windings/bearings) | 41% |
| Wiring or Switch Fault | 26% |
| Blocked Vent or Grill | 20% |
| Fan Blade Damage | 9% |
| Other Mechanical | 4% |
Step-By-Step: How to Replace the Motor in an Extractor Fan
Rolling up your sleeves? Here’s how most regular folks attack the job. And don’t worry—you don’t need an engineering degree. Just patience, common sense, and a couple of hours set aside (plus at least one cup of good coffee).
- Buy the Right Motor: Check your fan’s manufacturer, model, and serial number. These details are either on the outer housing or inside once you pop the front cover. Online parts shops and even dedicated high-street stores will let you order direct replacement motors. Universal replacements exist but stick with the recommended part when possible.
- Switch Off Power: Hit the breaker for that part of the house. Double-check with a non-contact tester or simply ensure the fan doesn’t buzz at all after flipping the switch. No shortcuts here—live wires don’t care about your plans.
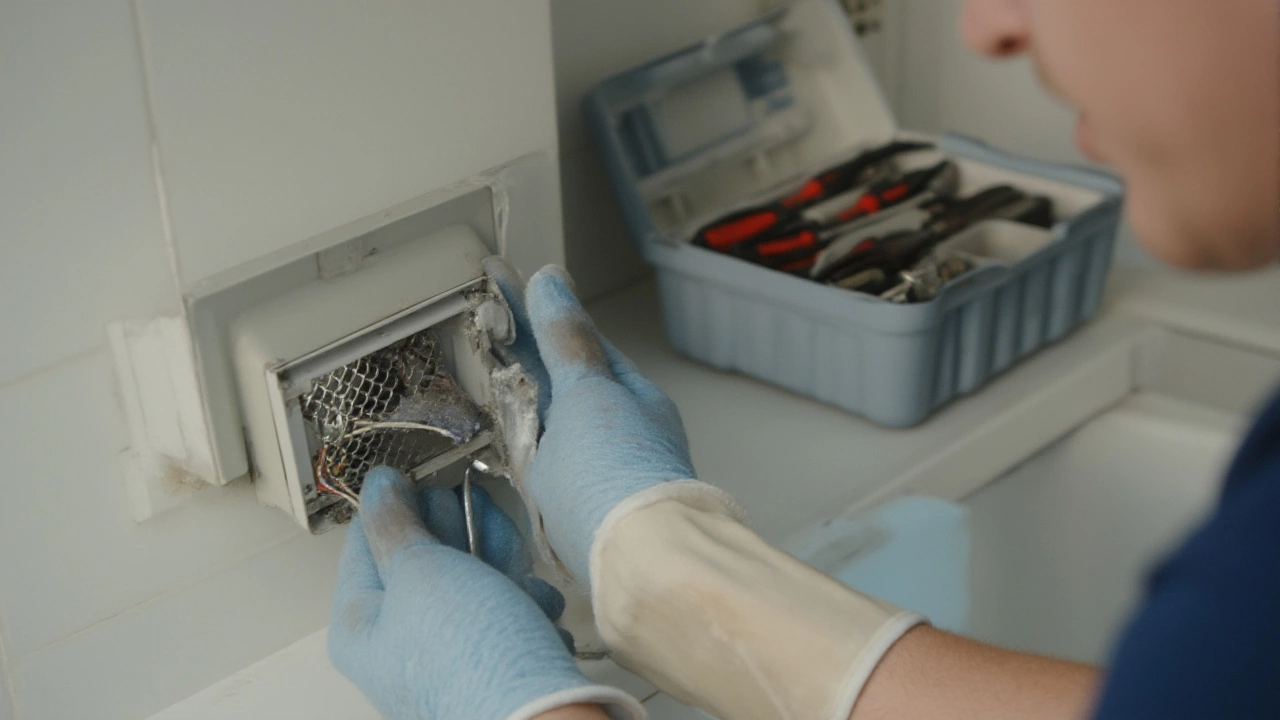
- Remove the Front Cover and Unscrew the Unit: Some covers pop off; others have screws you’ll find behind little caps. Keep screws safe (believe me, nothing destroys your day like dropping one down the sink). Gently pull the unit away from the wall or ceiling and lay it on a soft surface.
- Identify the Motor: The motor is bolted or clipped inside, usually attached to the fan blades and a small circuit board or terminal block. Take a photo before disconnecting anything. I learned this after endlessly puzzling over mystery wires once—the photo is gold when it’s time to put everything back.
- Disconnect Wiring: Unscrew or unclip wires connecting to the old motor. Sometimes the wires are held with quick connectors; you may need a small screwdriver in there. This is where your earlier photo will help you put things back correctly.
- Remove the Motor: Mostly, you’ll find two or four screws holding it in. Remove them and gently extract the motor, being mindful not to bend blades or crack the internal frame.
- Install New Motor: Fit in the new motor the same way—to the mounting points. Check the blades spin freely by hand. No weird rubbing or squeaking allowed at this stage.
- Reconnect Wires: Follow your earlier photo for reference. These should be tight and firm—loose connections can cause all sorts of problems.
- Reassemble the Fan: Put the fan body back in the wall or ceiling bracket, secure with the screws, and snap or screw the front cover back on.
- Restore Power and Test: Flip the breaker, power up the fan, and run it for a few minutes. Listen for smooth running, feel for a gentle breeze, and check for vibrations or any unusual odors.
One underrated tip: swap out the dust and filter mesh while you’re at it. A clogged grill chokes even a new motor, shortening its life span.
Many manufacturers provide simple how-to manuals. If you’re feeling shaky, search the model number plus "motor replacement" on YouTube. Loads of repair pros share their step-by-steps for every possible fan.
“Many extractor fan issues can be solved by regularly cleaning and replacing worn-out components like the motor—a repair that’s often within reach for most DIYers, as long as proper safety steps are followed.” — Jane Candlish, Certified Domestic Electrician, Good Housekeeping UK
A note about bathroom fans: UK wiring regs (IEE 18th Edition) recommend that only competent persons should work on fixed wiring installations, especially in bathrooms. If you’re changing a motor, okay. But if you find anything odd or suspect, call a qualified electrician.
Smart Tips and Tricks for Getting the Most Out of Your Extractor Fan
Replacing the motor is just one piece of the puzzle. Keeping your extractor fan humming along with fewer breakdowns doesn’t require rocket science—just a bit of regular attention.
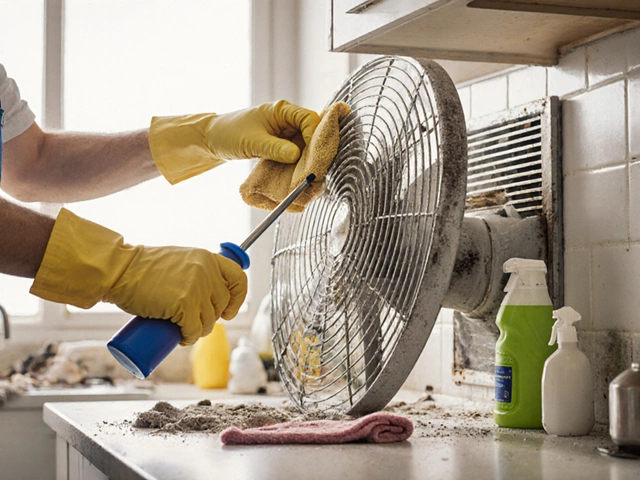
- Clean the fan blades and grill at least twice a year. Grease and lint shorten motor life by forcing it to work harder (it’s wild what a toothbrush and some soapy water can do).
- Vacuum vent hoses annually—especially if you’re a keen cook or live in a busy household. Blocked hoses overheat the motor faster than you’d expect.
- If you have a humidity-sensing bathroom fan, check the sensor regularly. Dirty sensors cause the fan to run longer or burn out early.
- Never bypass fuses or safety switches. These aren’t arbitrary; they protect from dangerous overloads and fire risk.
- If your fan is in a particularly damp or greasy area, replace it with a higher grade, like an IP44-rated model. Water and steam are the enemies of cheap motors.
A new fan motor should last 5-10 years with gentle use. If you find yourself replacing it yearly, something in the environment isn’t right—check for leaks, excessive dust, or voltage fluctuations.
And finally, remember that doing household repairs teaches real-life skills—keeps costs down and gives you stories to tell (or warnings for your kids about the importance of switch-off first!). Piper now asks if she can help any time I’m unscrewing a vent. Who knows, maybe she’ll be the one fixing the next fan motor in our place.