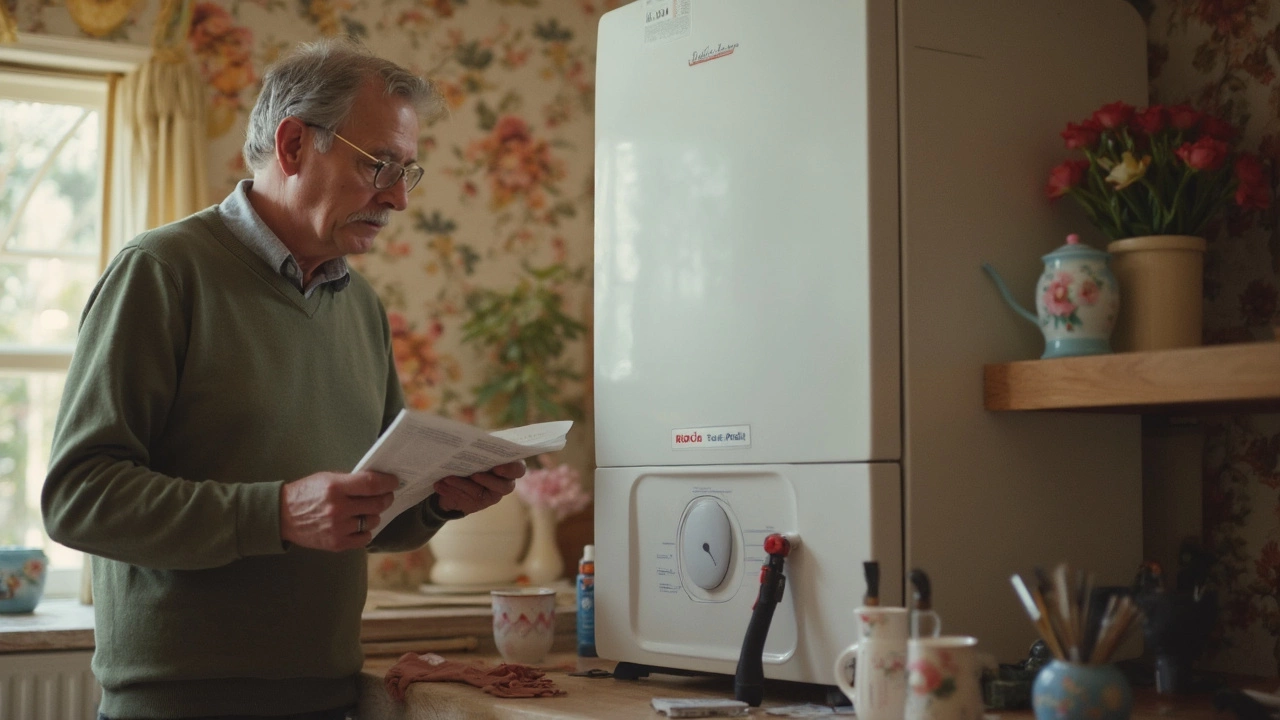
If your shower suddenly turns ice-cold, your water heater’s probably having a rough day. Most folks don’t think about water heaters until something breaks. But a little bit of know-how can save you heaps of frustration—and maybe a repair bill or two.
The funny thing is, water heaters nearly always fail in the same handful of ways. It’s like they’re following a script. Once you spot what usually goes wrong, you can fix small problems before they turn into disasters. I’ve cracked open enough heaters over the years to know which parts usually give up first, and trust me, it isn’t always obvious from the outside.
Stick around and I’ll walk you through the usual suspects, explain why these things happen, and throw in a few pro tips I use at home. Because nobody wants to hear their kid shout “Dad! The water’s freezing!” while they’re halfway through a shampoo. Let’s get your hot water back on track.
- Heating Elements: The Real Workhorses
- Thermostats and Temperature Trouble
- Leaks and Rust: When Water Goes Where It Shouldn’t
- Pressure Relief Valves and Safety Hazards
- Why Maintenance Matters (And How to Do It Right)
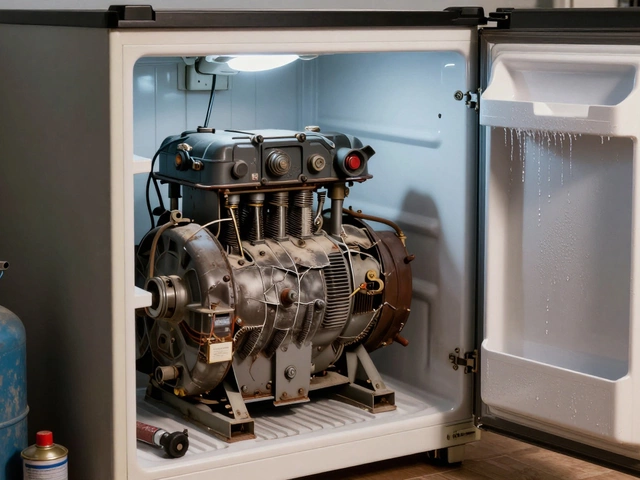
Heating Elements: The Real Workhorses
Think of the heating element as the engine of your water heater. Without it, you’re just storing cold water. Electric water heaters usually have two elements—one up top, one at the bottom—while gas units heat with a burner instead. Both styles can fail, but electric elements are the usual culprits when the water won’t heat up at all.
If your water goes cold fast or never really gets hot, chances are the element’s toast. Over time, sediment builds up on these metal rods. Once enough grit coats them, they have to work way harder and eventually burn out. Hard water—full of minerals—is a major troublemaker here. See the stats below on how frequently elements need to be replaced, especially in places with rough water.
| Cause | % of Heater Failures (Electric) |
|---|---|
| Burnt-out heating element | 41% |
| Sediment buildup on element | 22% |
| Other causes | 37% |
Testing a heating element isn’t rocket science. Flip off the breaker, remove the access panel, and use a multimeter to check for continuity. No beep? Time for a new element. They’re not expensive—a typical replacement runs $20-$40 and takes about an hour if you have a wrench and some patience.
- Cold water and no sign of leaks? Suspect the element first—especially if your heater is over five years old.
- Flush your heater yearly to clear out sediment. This keeps those elements working longer.
- If only half your tank is hot, one element may be shot. Usually, it’s the lower one.
I made the mistake of ignoring a slow-heating tank once and paid for it in cold showers for a week. Lesson learned: a failing element won’t fix itself. Stay ahead, and your water heater repair days will be a lot less stressful.
Thermostats and Temperature Trouble
When your water heater starts giving you cold or scalding showers, faulty thermostats are often the culprit. These small devices control when the heating elements turn on and off, helping keep the water just right. If they break, your water might not get hot enough—or it might get dangerously hot.
Electric water heaters usually have two thermostats: one for the upper heater and one for the lower. Gas water heaters have a different setup, with the thermostat built right into the gas control valve. In both cases, these parts are known to fail after a few years. I’ve replaced more than I can count, especially in homes where sediment builds up quickly from hard water.
Here’s how to spot thermostat trouble:
- Water temperature swings between freezing and boiling for no reason.
- No hot water at all (could also be a heating element, but thermostats are often to blame).
- The reset button on the thermostat keeps tripping, leaving you with cold water every day.
If you hear a “click” and nothing happens, or your heater’s reset button pops every few days, it’s definitely time for a thermostat check. Luckily, thermostats aren’t expensive, and you can swap one out with just a screwdriver and a little patience (after shutting off the power, of course). Gas models are trickier, though—it’s best to call a pro unless you really know what you’re doing.
Tip: Sometimes thermostats just need a little adjusting. Try setting yours between 120-130°F. This helps prevent burns and also fights off bacteria, which is a win-win for your family. For water heater repair, checking the thermostat is always one of my first moves—skip it, and you’re chasing symptoms, not the root problem.

Leaks and Rust: When Water Goes Where It Shouldn’t
This is probably the most annoying thing that can happen with a water heater. If you ever spot a puddle around your heater, don’t ignore it—water heaters aren't supposed to leak, ever. Most leaks come from a failed tank, worn-out fittings, or a busted valve. Once water starts escaping, it can do crazy damage fast to your floors, walls, or anything nearby.
Now, rust is the silent killer here. Electric and gas heaters both have a metal tank, and metal plus water equals rust over time. If you see rusty water coming from your hot tap, that’s usually a sign things are getting bad inside the tank. It means the inside of your heater’s probably corroding. Unfortunately, once the tank itself rusts through, it can’t be patched up and you’ll need a whole new water heater.
Here's the sneak attack: a lot of folks don’t know water heaters have something called an anode rod inside. This rod sacrifices itself to stop the tank from rusting. After a few years, the rod gets used up. If you replace it before it’s totally gone, you can water heater repair without needing a whole new tank. Most pros recommend checking that rod every two or three years—something you can even do yourself with a socket wrench if you feel brave.
Now, if you’re dealing with leaks, check the spots where pipes connect to the heater and look for drips around the bottom. Sometimes the leak’s not the tank itself but a loose or cracked fitting or a failing drain valve. Tighten connections, but if the tank is weeping from the bottom seam, that’s usually game over for the heater.
- Keep an eye out for rust streaks on the tank and around fittings.
- Test hot water for rusty color, especially after the heater sits unused for a while.
- Check under and around the heater for dampness or pooling—catch a problem early and you save a carpet or wooden floor.
The bottom line—if you catch rust or leaks early, you might dodge a lot of mess and expense. And if it’s just a worn part, it’s usually an easy fix. But don’t wait until your heater turns the laundry room into a swimming pool.
Pressure Relief Valves and Safety Hazards
Here’s something a lot of people miss: the little pipe sticking out the side or top of your water heater isn’t just there for looks. That’s the pressure relief valve, and it’s basically the MVP of water heater safety. If that valve fails, your water heater could turn into a makeshift rocket—not exaggerating here. The pressure relief valve pops open if pressure or temperature inside the tank gets too high, letting off steam, literally.
Most water heaters are set to handle water at about 120–140°F and up to 150 psi inside the tank. Above that, there’s a real risk of the tank bursting. That’s where the pressure relief valve steps in. But like anything, these valves can wear out or get clogged with mineral buildup, especially in places with hard water.
- If your valve drips all the time or won’t open and close easily, that’s a red flag.
- Sometimes these valves leak because they’re old; other times, the pressure in your tank is actually too high. Either way, ignoring it isn’t safe.
Testing your valve is simple. Just lift up the lever for a quick test—standing back, because hot water can pour out. If water doesn’t flow cleanly or the lever sticks, you’ll need a new valve. You can swap one out for about $15–$20 at any hardware store, but don’t ever block or plug it. That’s a huge safety risk.
| Common Relief Valve Problems | Possible Cause | Quick Fix |
|---|---|---|
| Valve leaks constantly | Old valve, high pressure, or tank overheating | Replace valve, check thermostat setting |
| Valve won't open during test | Mineral buildup or corrosion | Install new valve |
| Valve blows off without warning | Faulty thermostat, pressure spike | Check both valve and thermostat |
One more tip: check the label on your water heater for the max pressure and temperature ratings, and make sure the thermostat is set no higher than 120°F for safety and energy savings. And yeah, it’s smart to have your pressure relief valve checked during yearly maintenance. Water heater trouble can catch you off guard, but safety issues need your attention before anything else. Keeping on top of this tiny part could literally save your home—and keep your showers safe, too.

Why Maintenance Matters (And How to Do It Right)
Skip water heater maintenance and you’re basically asking for trouble. It’s like driving your car for years without changing the oil—the same gunk and wear builds up until something gives out. Even the best units don’t last forever, but k eeping up with basic care can add years to your heater’s life and help you catch problems before they knock out your hot water completely.
Let’s get real: flush the tank every year. Sediment collects at the bottom and acts as insulation, making your heater work harder to heat water. That not only means it runs less efficiently (yep, higher bills), but also that the bottom of your tank risks rusting out sooner. Most manufacturers actually list annual flushing in their manuals—it’s not just busywork.
Don’t ignore the pressure relief valve, either. This little part is supposed to open if pressure gets too high and prevent your tank from turning into a rocket. Pull the handle once a year, and if water doesn’t shoot out, replace it pronto. No part is more vital for safety.
Ever checked the anode rod? This metal stick inside the tank attracts minerals that would otherwise rust your tank from the inside out. If your water’s smelly, rusty, or your heater is over five years old, give it a quick look. Change it out when it’s mostly eaten away—easy insurance against leaks.
Here’s a simple checklist that covers the basics—nothing fancy, just what keeps heaters running right:
- Water heater repair often starts with a basic inspection—look for leaks, rust, or dampness around the base.
- Drain a few gallons from the tank every few months to flush out sediment (or do a full flush yearly).
- Test the temperature-pressure relief valve.
- Check the anode rod once every couple years.
- Keep the temperature set at 120°F—hot enough for showers, but not so hot your heater struggles.
Wondering what happens if you skip maintenance? Take a look. These stats tell the story:
| Maintenance Habit | Average Heater Lifespan |
|---|---|
| Annual Flushing | 13+ years |
| Skipping Maintenance | 6–8 years |
Your water heater won’t shout for help when it’s in trouble—a little attention each year can save you a pile of money (and icy showers). Even if you aren’t a DIY pro, just following this list will keep most surprises at bay.