Extractor Fan Installation Made Easy
Got a steamy kitchen or a damp bathroom? Installing an extractor fan is one of the quickest ways to improve air flow. You don’t need to be a tradesperson – just grab a few tools and follow these steps.
What You’ll Need
Before you start, gather these items: a drill with masonry bits, screwdrivers, a level, a stud finder, a pack of self‑tapping screws, ducting (if the fan needs to vent outside), caulking sealant, and safety glasses. Having everything on hand prevents trips back to the toolbox.
Step‑by‑Step Installation Guide
1. Choose the right spot. The fan should sit above the cooking surface in a kitchen or above the shower area in a bathroom. Use the stud finder to locate ceiling joists – you’ll want to mount the fan between them for solid support.
2. Mark and cut the opening. Measure the fan’s diameter and trace the circle on the ceiling. Put on safety glasses and drill a pilot hole at the centre. Then use a hole‑saw or jigsaw to cut the opening. Keep the cut piece for later; you’ll need it if you ever replace the fan.
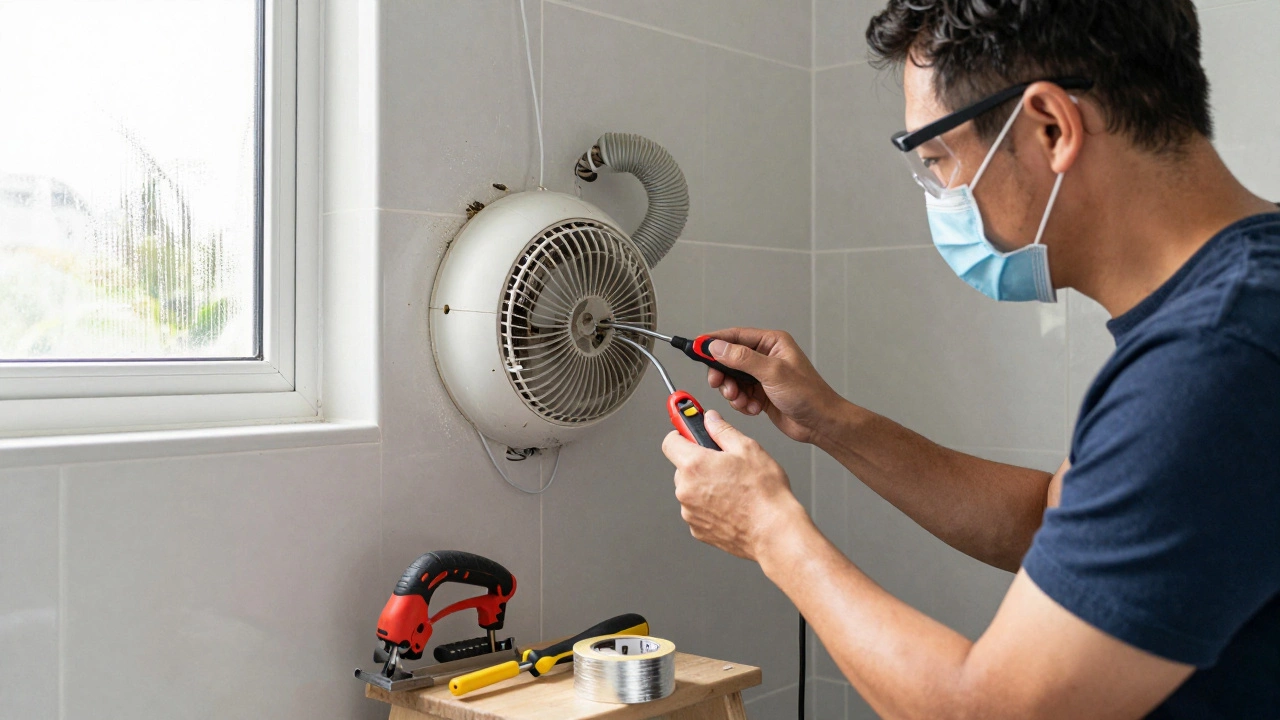
3. Prepare the duct. If your fan vents to the outside, attach the duct to the fan’s outlet before you lift it into place. Secure it with the supplied clamps and seal any gaps with foil tape. For recirculating fans, skip the duct and install the built‑in carbon filter.
4. Wire the fan. Turn off the electricity at the breaker. Connect the fan’s live (brown), neutral (blue), and earth (green/yellow) wires to the corresponding wires in the ceiling box. Use wire nuts and a screwdriver to tighten them. If you’re unsure, call an electrician – safety first.
5. Mount the fan. Slide the fan into the ceiling opening. Use the level to ensure it sits straight, then screw it into the joists with the self‑tapping screws. Tighten securely but don’t over‑tighten, or you could crack the housing.
6. Seal and finish. Apply a bead of caulking around the fan’s edge to stop drafts. If you have a decorative grill, snap it on now. Turn the power back on and test the fan. You should hear a steady hum and feel air moving out through the vent.
That’s it – you’ve installed an extractor fan without hiring a pro. A clean, working fan helps prevent mould, removes cooking smells, and keeps your home healthier.
Need extra help? A quick online video can show you the exact motion of the motor and how the grill fits. If the motor ever gets dirty, a simple cleaning routine (wipe the blades, clear dust from the housing) will keep it quiet and efficient.
Remember, regular maintenance prolongs the life of your fan. Check the motor every few months, clean the filter, and tighten any loose screws. With these habits, your extractor fan will stay reliable for years.
Now you’re ready to enjoy fresh air without the hassle of a steamy kitchen or a muggy bathroom. Happy installing!
Can I Install an Extractor Fan Myself? A Realistic Guide for Homeowners
Learn whether you can safely install an extractor fan yourself in Brisbane's humid climate. This guide covers when DIY works, what tools you need, common mistakes, and when to call a professional.

Who Installs Extractor Fans? Finding the Right Pro
Extractor fans are essential for keeping spaces well-ventilated and free of excess moisture or odors. Knowing who installs them is crucial for ensuring the job is done correctly and safely. This article explores the professionals involved in installing extractor fans, providing insights and tips on finding the right person for the job. It aims to equip readers with practical knowledge, from understanding basic installation needs to recognizing when expert help is required.