Electric Oven Element Cost Estimator
Enter your details below to get a realistic estimate for your specific situation.
Cost Breakdown (AUD)
Our Recommendation:
You’re standing in your kitchen, staring at a pie that’s still raw in the middle while the crust is burning. The oven light is on, the fan might even be spinning, but there’s zero heat coming from those metal coils. It’s frustrating, sure, but before you panic and call out a technician for a $150 service call-out fee, you need to know what you’re actually dealing with. Replacing an electric oven element is one of the most common appliance repairs, and the cost varies wildly depending on whether you tackle it yourself or hire a pro.
In 2026, the average cost to replace a faulty heating element ranges from $80 for a basic DIY part to over $300 for a professional installation involving premium brand parts. But here’s the kicker: sometimes the element isn’t broken at all. A faulty thermostat or a blown fuse can mimic the exact same symptoms, leading you to buy a part you don’t need. This guide breaks down the real numbers, the hidden risks, and how to decide if this is a weekend project or a job for the pros.
The Real Cost Breakdown: Parts vs. Labor
Let’s cut through the noise. When people ask "how much," they usually want a single number. But appliance repair doesn’t work like buying milk. You have two distinct cost centers: the hardware and the human labor.
The heating element itself is the physical coil that generates heat. For standard domestic ovens found in most Australian homes (like Whirlpool, Westinghouse, or Bosch), a generic or OEM replacement element typically costs between $40 and $90 AUD. If you own a high-end European brand like Miele or Gaggenau, or if you need a specialized grill element, prices can jump to $150-$250. These aren’t universal parts; they are model-specific components designed to fit precise dimensions and voltage requirements.
Labor is where the math gets interesting. In Brisbane and across Australia, licensed appliance technicians generally charge a call-out fee ranging from $120 to $160. This covers their travel time and initial diagnostic assessment. If the diagnosis confirms the element needs replacing, the actual replacement labor usually adds another $80 to $120 per hour. Since swapping an element is rarely more than a 30-minute job once you’re inside the oven, many techs bundle this into a flat-rate repair fee. Expect a total bill of $250-$350 for a professional replacement on a standard oven.
| Scenario | Part Cost | Labor Cost | Total Estimated Cost |
|---|---|---|---|
| DIY (Standard Brand) | $40 - $90 | $0 | $40 - $90 |
| DIY (Premium/European Brand) | $150 - $250 | $0 | $150 - $250 |
| Professional Service (Standard) | $40 - $90 | $180 - $250 (Call-out + Labor) | $220 - $340 |
| Professional Service (Complex Access) | $40 - $90 | $250 - $350 | $290 - $440 |
Is It Actually the Element? Diagnosing Before You Buy
Here is the most expensive mistake homeowners make: buying a new element only to find out the old one was fine. Symptoms of a dead element-no heat, uneven cooking-are identical to symptoms of other failures. Before you spend money, check these three things.
First, look at the element visually. Most modern elements are enclosed behind a back panel, but some older models have exposed coils. If you see visible blistering, cracks, or a distinct burn mark on the coil, it’s definitely dead. However, if it looks intact, don’t assume it’s working. Internal resistance can fail without external damage.
Second, check your thermal fuse. This small safety device cuts power if the oven overheats. If it blows, the oven won’t heat, but the light and fan might still work. Testing a thermal fuse requires a multimeter and checking for continuity. If it has no continuity, it’s blown and needs replacing-a part that often costs under $15.
Third, rule out the thermostat. A faulty thermostat might not send the signal to turn the element on. If your oven temperature fluctuates wildly or doesn’t reach the set point before dying, the thermostat is likely the culprit, not the element. Misdiagnosing this leads to wasted money on a new element that won’t fix the underlying control issue.
DIY vs. Professional: Who Should Do the Job?
Should you grab a screwdriver or pick up the phone? The answer depends on your comfort level with electricity and the design of your oven.
Go DIY if:
- Your oven is freestanding and easy to pull away from the wall.
- You have basic tools (screwdrivers, nut driver) and a multimeter.
- You can safely disconnect the appliance from the mains power.
- The element is accessible by removing just one back panel.
Hire a Pro if:
- Your oven is built-in and requires disassembling cabinetry or complex wiring harnesses.
- The oven is under warranty (opening it yourself might void coverage).
- You are uncomfortable working near live electrical terminals.
- The fault persists after replacing the element (indicating a deeper electrical issue).
In Australia, strict electrical safety standards apply. While replacing a plug-in element is generally considered a minor appliance repair, messing with internal wiring carries risk. If you’re renting, always get landlord approval before attempting DIY repairs, as improper fixes can lead to liability issues later.
Step-by-Step: How to Replace the Element Yourself
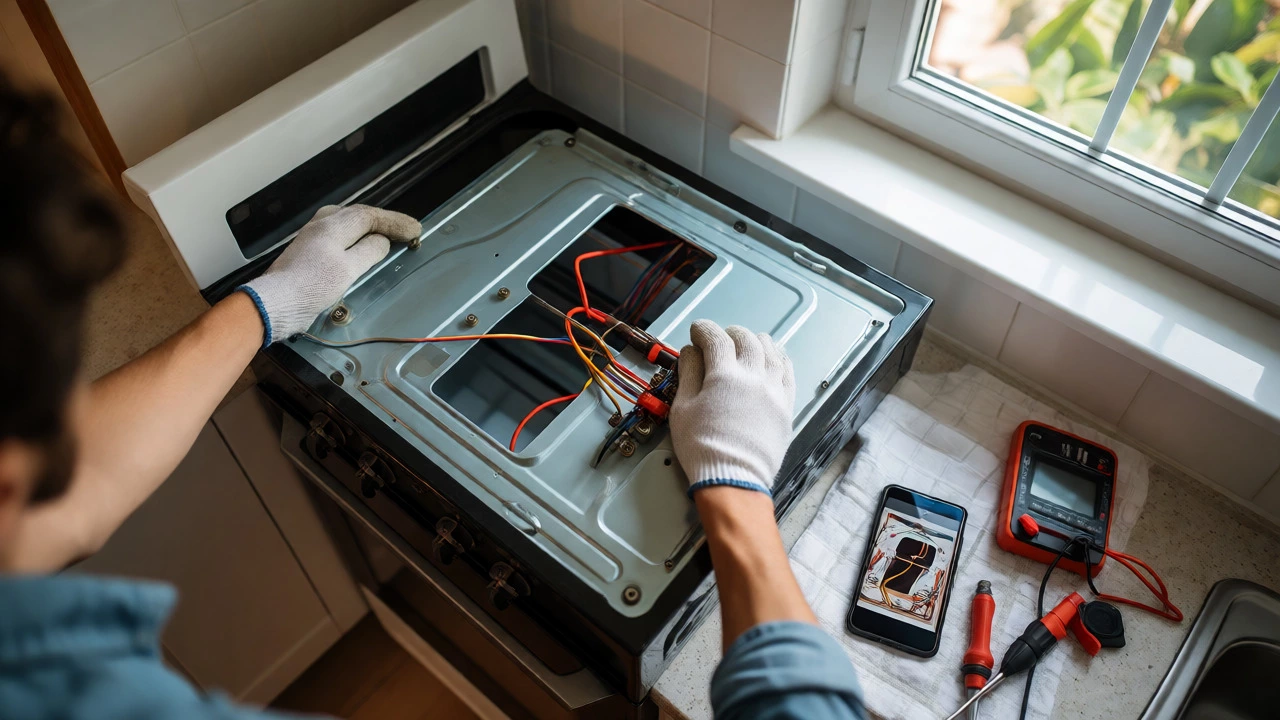
If you’ve decided to save that $200 labor fee, here’s how to do it safely. Note: Always unplug the oven from the wall socket. If it’s hardwired, switch off the dedicated circuit breaker at your switchboard. Never rely solely on the oven’s digital display being off.
- Remove the racks: Take out all oven shelves and trays to give yourself clear access to the back wall.
- Access the element: Locate the screws holding the rear cover plate. Unscrew them carefully. Some plates hang from hooks; others sit in brackets. Set the screws aside in a cup so they don’t roll into the floor gaps.
- Disconnect the wires: Take a photo of the wiring configuration first! This is crucial. Use a screwdriver to loosen the terminal screws securing the wires to the element. Gently pull the spade connectors off. If they are tight, wiggle them gently-do not pull the wire itself, as this can damage the insulation.
- Remove the old element: Undo the mounting nuts or screws holding the element bracket to the oven back. Pull the element out through the opening.
- Install the new element: Feed the new element into place. Secure it with the original mounting hardware. Ensure it sits flush and doesn’t touch the oven walls.
- Reconnect the wires: Refer to your photo. Push the spade connectors onto the terminals and tighten the screws firmly. Loose connections cause arcing and can burn out the new element quickly.
- Test run: Reattach the back cover, put the racks back, and restore power. Turn the oven to 180°C (350°F). Within 10 minutes, the element should glow red-hot. If it doesn’t, double-check your connections.
Common Pitfalls That Drive Up Costs
Why do some replacements end up costing $400 when they should have been $200? Usually, it’s because of overlooked complications.
Wrong Part Number: Elements look similar but vary by wattage and shape. Installing a 2000W element in a slot designed for 1800W can trip your household circuit breaker repeatedly. Always match the specifications printed on the old element or use your oven’s model number (usually found on a sticker inside the door frame) to order the correct part.
Corroded Terminals: Over years of heating and cooling, terminal blocks can corrode. Even if you install a new element, poor contact at the connection point prevents proper heating. A pro will clean or replace the terminal block, adding $30-$50 to the bill. DIYers often miss this, resulting in a "new" element that fails within weeks.
Sealed Units: Some modern ovens have sealed rear panels that require specific tools or techniques to open without cracking the enamel. Breaking a panel during a DIY attempt turns a cheap repair into a costly replacement of the entire rear assembly.
Frequently Asked Questions
How long does an electric oven element last?
With normal use, a quality heating element should last between 10 and 15 years. Factors like frequent self-cleaning cycles (which generate extreme heat) or using the grill function excessively can shorten its lifespan. Poor ventilation around the oven can also cause premature failure due to overheating.
Can I drive with a broken oven element?
This question applies more to car heaters, but for ovens, the equivalent is "can I still use my oven?" Yes, you can physically use the oven, but it won’t cook food properly. If only one element (e.g., the top grill) is broken, you can still bake using the bottom element. If both fail, the oven is essentially a cold box until repaired.
Is it worth repairing an old oven?
Generally, yes. If the repair cost is less than 50% of the price of a new oven, it’s worth fixing. An element replacement is cheap compared to buying a new appliance ($600+). However, if your oven is over 15 years old and has multiple failing components (door seals, hinges, electronics), replacement might be more economical in the long run.
What causes an oven element to blow?
The most common cause is natural wear and tear from repeated heating cycles. Other causes include water splashing onto a hot element (causing thermal shock), food debris accumulating on the coil leading to hot spots, or voltage spikes from the power grid. Using aerosol sprays directly on the element can also degrade the coating over time.
Do I need a licensed electrician to change an oven element?
In Australia, changing a plug-in oven element is generally considered a minor appliance repair that doesn’t strictly require a licensed electrician, provided you isolate the power correctly. However, if the oven is hardwired and you need to modify wiring or if local council regulations are strict, hiring a licensed technician ensures compliance and safety, especially for insurance purposes.
![What Is the Most Common Problem With Heat Pumps? [2026 Guide]](/uploads/2026/03/thumbnail-what-is-the-most-common-problem-with-heat-pumps-2026-guide.webp)