Extractor Fan Capacity Calculator
Enter your room dimensions to find the recommended extraction rate (m³/h) to keep your space dry and mold-free.
Recommended Rate: 0 m³/h
Enter dimensions to see the calculation.
Main Takeaways for Your DIY Project
- Check if your current fan is wired to a separate switch or linked to the light.
- Ensure the new fan fits the existing ducting size to avoid airflow bottlenecks.
- Always turn off the power at the main breaker, not just the wall switch.
- Use a voltage tester to confirm the wires are dead before touching them.
- Match the extraction rate (m³/h) to the size of your room for the best results.
Understanding the Extractor Fan System
Before you start ripping things out, let's look at what you're actually dealing with. Extractor Fan is a mechanical ventilation device designed to remove contaminated or humid air from a room and exhaust it outdoors. In most homes, this involves a motor, a fan blade, a housing unit, and a duct. If you're in a kitchen, you're likely dealing with a Range Hood, which filters grease; in a bathroom, it's usually a ceiling-mounted unit designed to stop mold growth.
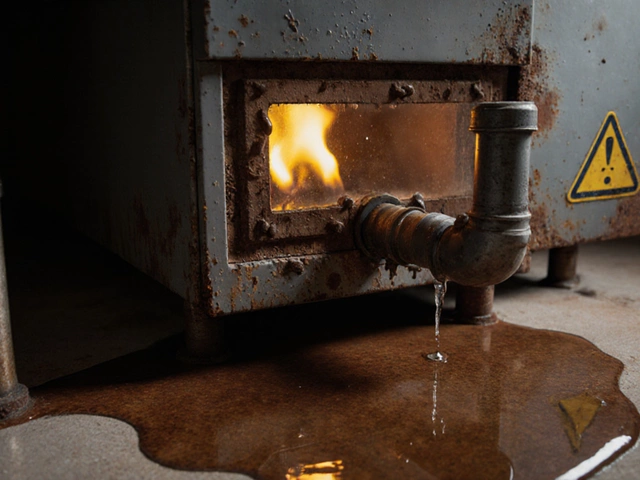
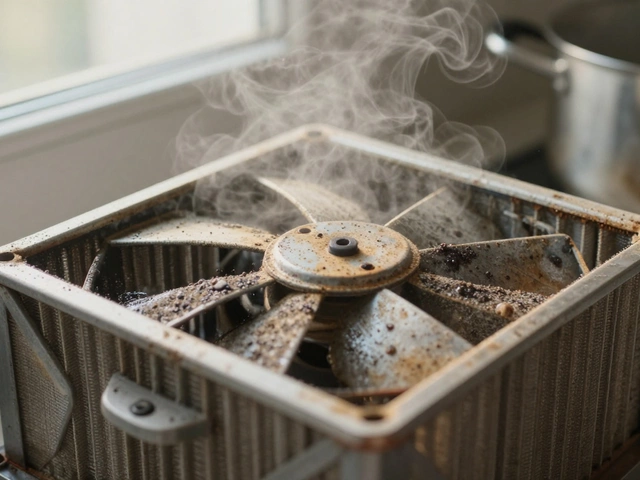
The magic happens through Airflow. When the fan spins, it creates a low-pressure zone, pulling air from the room and pushing it through a Duct (usually PVC or flexible foil) to the outside. If the fan motor burns out or the bearings seize, the air just sits there. Replacing the entire unit is often cheaper and more efficient than trying to source a specific replacement motor from a manufacturer that might have gone out of business ten years ago.
The Gear You'll Need
You don't need a professional workshop for this, but you do need the right tools. Using a butter knife or a pair of pliers when you need a screwdriver is a recipe for stripped screws and frustration. Here is the kit you should have ready:
- Voltage Tester: This is non-negotiable. It tells you if the wire is live.
- Screwdriver Set: A mix of Phillips and flat-head.
- Wire Strippers: For cleaning up the ends of the cables.
- Adjustable Wrench: To tighten duct clamps.
- Step Ladder: Make sure it's stable and not leaning on something flimsy.
- Cable Connectors: Plastic screw-caps or lever-style connectors (like Wagos) to secure the wiring.
If you're buying a new unit, check the specs. A fan with a low Extraction Rate in a large room will just move the steam around without actually removing it. For a standard bathroom, look for something that can move at least 15 to 30 cubic meters of air per hour.
Step-by-Step Replacement Process
Now, let's get into the actual replace extractor fan process. Take your time here; rushing is how people end up with a hole in their drywall.
- Kill the Power: Go to your main electrical panel and flip the breaker for the room. Do not trust the wall switch. Turn it off, then use your voltage tester on the fan's wires to make sure there is zero current.
- Remove the Cover: Most fans have a plastic grille that snaps off or is held by one or two small screws. Gently pull it away. If it's painted over, use a putty knife to break the seal without cracking the plastic.
- Disconnect the Wiring: You'll see wires connecting the fan to the house power. Unscrew the connectors and pull the wires out. Take a photo of how they were connected-this saves you a massive headache when you're trying to remember which wire was the neutral.
- Unmount the Unit: Unscrew the fan housing from the ceiling or wall joists. Carefully lower the unit. Be mindful of the ducting; if it's held by a clamp, loosen it first so you don't tear the foil.
- Prep the New Fan: Compare the new unit to the old one. If the new one is slightly smaller, you might need to add a spacer or a trim ring. If it's larger, you may need to widen the hole with a drywall saw.
- Connect the New Wires: Strip a small amount of insulation from the house wires if they're frayed. Connect the live, neutral, and earth wires to the corresponding terminals on the new fan. Tighten the connectors firmly.
- Seal the Duct: Slide the duct over the new fan's outlet. Secure it with a metal clamp or high-quality foil tape. If air leaks from the duct inside your ceiling, that moisture will eventually rot your joists.
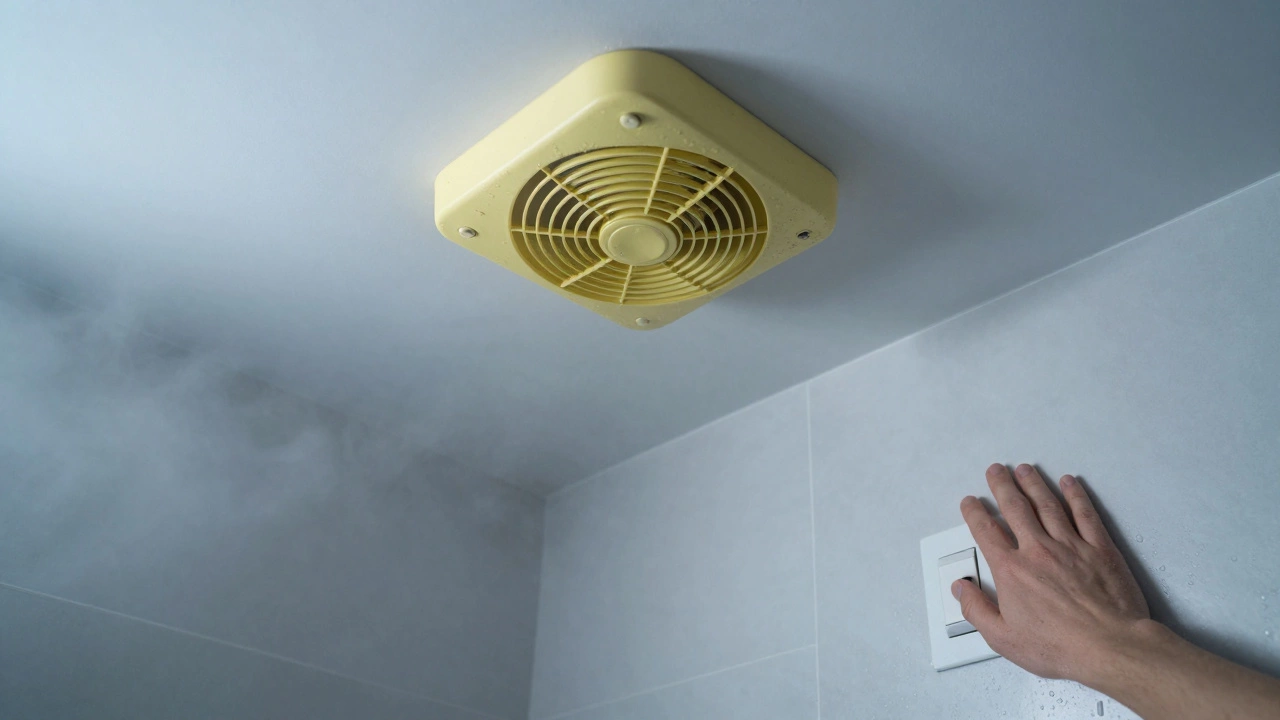
- Mount and Test: Screw the housing into place. Turn the power back on at the breaker and flip the switch. Hold a single sheet of toilet paper or a tissue up to the grille-if it sucks the paper tight against the fan, you've succeeded.
Common Pitfalls and How to Avoid Them
Most DIY failures happen because of a few common mistakes. First, people often ignore the Backdraught Shutter. This is a little flap that lets air out but stops wind from blowing back into your house. If your new fan doesn't have one, or if it's installed backward, you'll find your bathroom smelling like the outdoors during a storm. Always check the arrow on the unit indicating the airflow direction.
Another issue is choosing a fan that's too loud. Look for the Noise Level, measured in decibels (dB). A fan that's 40dB is a quiet hum; one that's 60dB sounds like a vacuum cleaner in your ear. If you're installing this in a bedroom ensuite, go for a low-dB model so you don't wake up the whole house every time you wash your hands.
Comparing Fan Types: Which One Should You Buy?
Not all fans are created equal. Depending on where you live and what the room is used for, you might want a specific type of technology. Use the table below to decide which one fits your needs.
| Fan Type | Best For | Pros | Cons |
|---|---|---|---|
| Axial Fan | Small bathrooms | Cheap, easy to install | Lower power, louder |
| Centrifugal Fan | Long duct runs | Powerful, pushes air far | More expensive, bulkier |
| Humidistat Fan | Mold-prone rooms | Turns on automatically | Higher cost, requires setup |
| Inline Fan | Large open spaces | Extremely quiet, high flow | Requires ceiling access |
If you have a long run of piping from the fan to the outside wall, an axial fan will struggle. The air just gets stuck in the pipe. In that case, a centrifugal fan is your best bet because it creates more pressure to push the air through those bends and turns.
When to Call a Professional
While replacing a unit is straightforward, some situations are red flags. If you open your fan and see charred wires, melted plastic, or a complete lack of a grounding (earth) wire, stop immediately. This indicates a deeper electrical problem that could lead to a fire. Similarly, if you discover that your original fan wasn't actually vented to the outside but was just blowing air into the attic (a common mistake in older homes), you need a professional to install a proper Ventilation System.
Working with electricity is always a risk if you aren't confident. If you find yourself staring at the wires and thinking, "I have no idea what these colors mean," that's the moment to call a licensed electrician. A hundred dollars for a professional install is much cheaper than a house fire.
How do I know if my extractor fan is actually broken?
If the fan is making a loud grinding noise, spinning slowly, or not spinning at all despite the light being on, the motor is likely dead. You can also check for "dead spots" where the air doesn't feel like it's moving. If you can hear the motor humming but no air is moving, the fan blade might be clogged with dust or disconnected from the shaft.
Can I replace a vented fan with a ventless one?
You can, but it's generally a bad idea. Ventless fans usually rely on charcoal filters to "clean" the air rather than removing it. In a bathroom, a ventless fan won't remove the humidity, meaning you'll still have a high risk of mold and mildew on your walls and ceiling. Always stick to a vented system if a duct is already available.
What is the best way to clean an extractor fan before replacing it?
If you think the fan is just dirty, remove the cover and use a vacuum cleaner with a brush attachment to remove dust from the blades. For kitchen fans, soak the grease filters in hot soapy water and a bit of degreaser. If the motor is still struggling after a deep clean, it's time for a replacement.
Do I need a building permit to replace a fan?
Generally, replacing an existing fan with a similar model (a "like-for-like" replacement) does not require a permit. However, if you are installing a brand new ventilation system where none existed before, or changing the structural layout of your vents, you should check your local building codes.
How often should I replace my extractor fan?
There is no set expiration date, but most residential fans last between 5 to 10 years. If you notice a drop in suction power or an increase in noise, it's a sign that the bearings are wearing out. Replacing them every decade ensures your home stays dry and your air stays fresh.
Next Steps and Troubleshooting
Once the new fan is in, keep an eye on it for the first few days. If you notice the fan is rattling, check if the screws are too tight-sometimes over-tightening the housing against a wooden joist can cause vibrations. If the fan isn't pulling enough air, check that the external vent flap isn't stuck shut by a bird's nest or accumulated debris.
For those living in coastal areas, look for fans with corrosion-resistant coatings. Salt air can eat through cheap metal components in a matter of months. If you're upgrading to a smart home, consider a fan with a built-in humidity sensor; it removes the guesswork by turning itself on whenever the room reaches a certain moisture level, keeping your paint from peeling and your mirrors clear.